Lamp Stack Implementation on AWS (Linux, Apache, MySQL, and PHP.)
This will be a project-based article, with me walking you through the entire process. Now, this might be a four-project series where we implement different Web stack implementation, but for today’s emphasis, it will be laid on just the Lamp stack implementation (Linux, Apache, MySQL, PHP, Python, or Perl)
Now you might ask, What is Webstack? Lamp stack?
A web stack: what is it? A webstack is a collection of tools and frameworks used in software development. This collection of frameworks and tools has been carefully selected to complement one another in order to produce software that functions properly. These are abbreviations for distinct technologies combined for a particular technology product. Here are a few webstacks below:
LAMP stands for Linux, Apache, MySQL, PHP, Perl, or Python.
LEMP stands for Linux, Nginx, MySQL, PHP, Perl, or Python.
MERN MongoDB, ExpressJS, ReactJS and NodeJS.
MEAN — (MongoDB, ExpressJS, AngularJS and NodeJS)
As agreed, today's focus will be on the LAMP stack. In order to complete this project, you will need an AWS account and a virtual server with the Ubuntu Server OS. AWS is the biggest cloud service provider, and it offers a free tier account that we are going to leverage for our projects.
STEP 1: INSTALLING APACHE WEB SERVER AND UPDATING THE FIREWALL.
What is APache? Apache is web server software that is responsible for accepting HTTP requests from visitors and sending them back the requested information in the form of web pages. Or, in simpler terms, it allows visitors to view content on your website. We have other webservers such as Nginx, Lighttpd, etc.
Apache is a popular open-source, cross-platform web server that is, by the numbers as of December 2023, the most popular web server in existence, which makes it a great default choice for hosting a website.
First things first, update and upgrade your Ubuntu server using the following command:
sudo apt update && sudo upgrade -yInstall Apache web server using Ubuntu's package manager, ‘apt’, so run the command:
sudo apt install apache2Please note that when trying to install an Apache web server on a system using the yum package manager, which is typically used in Red Hat Enterprise Linux (RHEL), CentOS, and Fedora distributions, the command differs from Debian-based distributions such as Ubuntu, which is what we are using for this project.
To verify if Apache Web Server has been downloaded successfully and is currently running on your operating system, run the command:
sudo systemctl status apache2Mine is currently running, as seen below;

Chances are, once you’ve run the command to check for Apache HTTP Server (httpd), it might be currently inactive or stopped on your system. The status inactive (dead) indicates that the service is not running.
To start Apache HTTP Server, you can use the following command:
sudo systemctl start apache2After starting the service, you can check its status again to ensure that it’s running properly.
However, if you want Apache HTTP Server to start automatically upon system boot, you can enable it using the command:
sudo systemctl enable apache2This will ensure that Apache starts automatically whenever the system boots up.
PORT MAPPING
Since our EC2 machine’s TCP port 22 is open by default for SSH access, we must add a rule to the EC2 setup in order to allow inbound connections through port 80: Allow incoming traffic through port 80.
As seen below; EC2 → SECURITY GROUPS → EDIT INBOUND RULES.
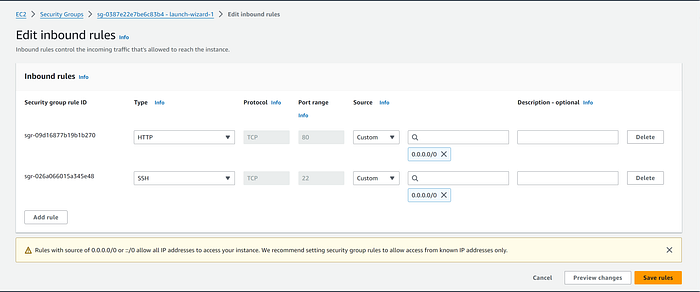
After editing the inbound rules for port 80, click on “Save rules”.
This ensures we can reach our server both locally and remotely (from any IP address) using the URL source 0.0.0.0/0. Our server is up and operating.
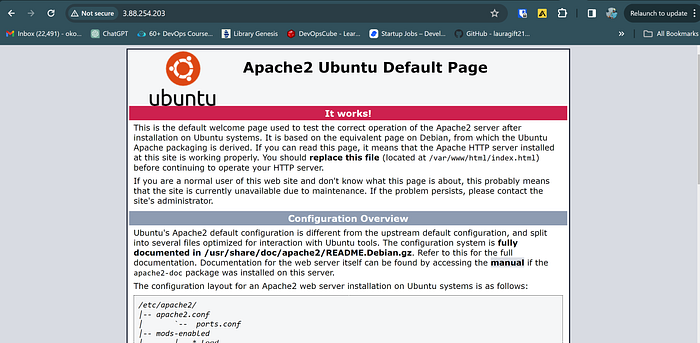
It’s time to see how well our Apache HTTP server can handle requests from the Internet at this point. Try to visit the following URL in your preferred web browser: URL: http://<Your-Public-IP-Address>:80
Here is mine, it clearly works!
STEP 2: INSTALLING MYSQL.
To manage and store data for your website in a relational database, you must install a database management system (DBMS) after starting your web server.
Since MySQL is a popular relational database management system in PHP settings, we’re going to use it for our project.
In accordance with https://www.statista.com/statistics/809750/global-popularity-ranking-database-management-systems/ MySQL is the second most widely used database management system on the planet.
We may state that MySQL is at the top of this ranking among free database management systems, as Oracle is neither free nor open-source. I consider MySQL to be number one in my books anyway.
To install MySQL on your server, run the command:
Sudo apt install mysql-server -yAfter installation, it’s often recommended that you run a security script that comes preinstalled with MySQL. This script will remove some insecure default settings (not all) and lock down access to your database system.
Start the script by running the command:
sudo mysql_secure_installationImmediately you will be prompted to VALIDATE PASSWORD COMPONENT. This is being used to test passwords and improve security. It checks the strength of the password and allows the users to set only those passwords that are secure enough.
Would you like to set up the VALIDATE PASSWORD component?
Press y|Y for Yes, any other key for No:After selecting your choice, you will be prompted with many options, such as privileges, anonymous users, and test databases. Upon completion of all of this, the installation will be secured, as seen below.
Now let’s login to the database with the command:
sudo mysqlAnd to exit the database, you run the command:
exitNow, we have established that the MySQL server is now installed and secured. Next, we will install PHP, the final component in the LAMP stack. Shall we?
STEP 3: INSTALLING PHP.
We have MySQL installed to store and handle our data, and Apache installed to serve our content. Our setup’s PHP component will execute code and show dynamic material to the user. You’ll need php-mysql, a PHP module that enables PHP to interact with MySQL-based databases, in addition to the PHP package. Additionally, libapache2-mod-php is required in order for Apache to handle PHP files. Dependencies for core PHP packages will be installed automatically.
In order for PHP to function with Apache and connect to MySQL, we will install PHP along with other dependencies.
sudo apt install php libapache2-mod-php php-mysqlTo confirm we have successfully downloaded PHP, we can run the following command to check for the version:
php --versionHere is mine:

At this point, your LAMP stack is completely installed and fully operational.
- Linux. (Ubuntu)
- Apache HTTP Server.
- MySQL
- PHP
To test your setup with a PHP script, it’s ideal to set up a proper Apache Virtual Host to hold your website’s files and folders. A virtual host allows you to have multiple websites located on a single machine, and users of the websites will not even notice it.
We will configure our first virtual host in the next step.
STEP 4: SETTING UP A VIRTUAL HOST FOR YOUR WEBSITE USING APACHE.
What's an Apache Virtual Host?
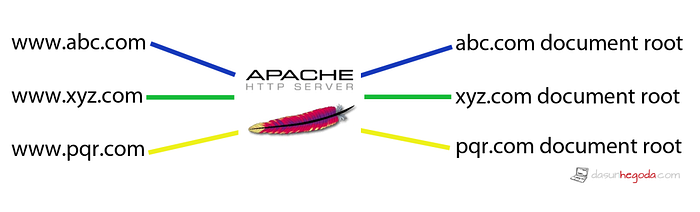
Apache Virtual Hosts, A.K.A virtual host (Vhost) is used to run more than one web site (domain) using a single IP address. Many websites (domains) can be operated on a single IP address. Otherwise, a single server can host several websites, or domains. Because the user’s requested URL has been mapped to the document’s root, as can be seen in the diagram below, different sites will be displayed based on the request.
The Apache server block that comes with Ubuntu 20.04 is configured by default to serve files from the /var/www/html directory. The settings will remain the same, but we will add our own directory next to the default one.
Using the “mkdir” command, create a directory with the name — project-lamp in the /var/www/html directory as follows:
sudo mkdir /var/www/html/project-lampNext, give your current system user ownership of the directory using the command:
sudo chown -R Project-lamp /var/www/$USER:$USER Next, use your preferred command-line editor to create and open a new configuration file in Apache’s sites-available directory using the command:
sudo vi /etc/apache2/sites-available/project-lamp.confThe command above create a config file in that path's directory, and then we insert the configuration below into the config file.
<VirtualHost *:80>
    ServerName project-lamp
    ServerAlias www.project-lamp
    ServerAdmin webmaster@localhost
    DocumentRoot /var/www/project-lamp
    ErrorLog ${APACHE_LOG_DIR}/error.log
    CustomLog ${APACHE_LOG_DIR}/access.log combined
</VirtualHost>
After saving the config file, you can run the ls command to confirm and show the new file in the sites-available directory
sudo ls /etc/apache2/sites-availableYou should see something like this below, with the first two being default, like we explained earlier, and the latter being the config file we just created.

The Config file we inserted earlier simply means we are instructing Apache to serve project-lamp with /var/www/project-lamp as its web root directory by utilizing this VirtualHost configuration. You can comment out or remove the ServerName and ServerAlias options by adding a # character at the beginning of each option’s line if you would like to test Apache without a domain name. The program will not process the instructions on those lines if the # character is added there.
To enable the new virtual host, run the command:
sudo a2ensite project-lampRun the following to ensure that there are no syntax issues in your configuration file:
sudo apache2ctl configtestLastly, restart Apache for these modifications to take effect, then run the command:
sudo systemctl reload apache2The website is now live, although the web root /var/www/project-lamp is currently empty. In order to verify that the virtual host functions as anticipated, create an index.html file at that location with the command:
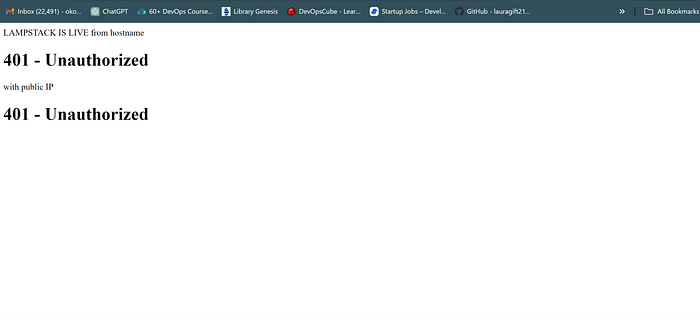
sudo sh -c "echo 'LAMP IS LIVE from hostname' $(curl -s http://169.254.169.254/latest/meta-data/public-hostname) 'with public IP' $(curl -s http://169.254.169.254/latest/meta-data/public-ipv4) > /var/www/project-lamp/index.html"The command provided above attempts to echo the message “LAMP IS LIVE from hostname,” containing hostname and public IP information, into an HTML file located at /var/www/project-lamp/index.html
Now, try opening the URL of your website in your browser by utilizing its IP address or your DNS name:
[<Your-Public-IP-Address>:80] OR [<http://<Your-Public-DNS-Name>:80>]If the content that you wrote with the “echo” command appears in the index.html file, your Apache virtual host is operating as it should.
Here is mine; it works!
STEP 5: SETTING UP PHP
By default, when using Apache, if you have both an index.html and an index.php file in a directory, the server will display the index.html file first. This is handy for displaying maintenance pages in PHP applications. You can create a temporary index.html file with a message for visitors, and because it takes precedence over index.php, it becomes the main page during maintenance. Once maintenance is done, you can simply rename or delete the index.html file, and the regular application page will return.
If you wish to adjust this setup and prioritize index.php over index.html, you need to edit the /etc/apache2/mods-enabled/dir.conf file. Simply rearrange the order of index.php in the DirectoryIndex directive to achieve this using the command:
sudo vi /etc/apache2/mods-enabled/dir.confHere is what mine looks like below, and you can see the hierarchy with index.html leading the pack and in that order.
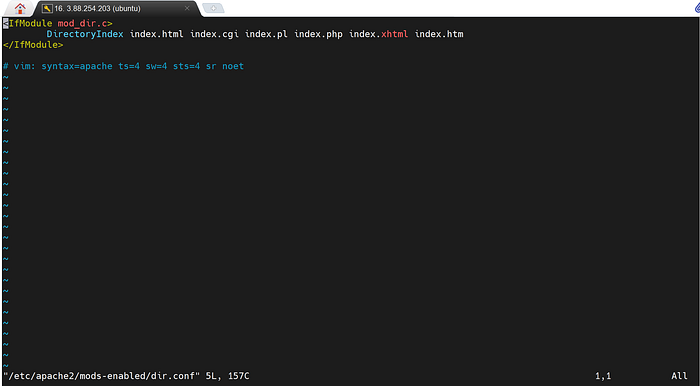
Now, we want to change that order, with index.php leading the pack. To do this seamlessly, edit and insert the following:
<IfModule mod_dir.c>
        #Change this:
        #DirectoryIndex index.html index.cgi index.pl index.php index.xhtml index.htm
        #To this:
        DirectoryIndex index.php index.html index.cgi index.pl index.xhtml index.htm
</IfModule>
After saving and closing the file, you will need to reload Apache so the changes take effect. Run the command:
sudo systemctl reload apache2To ensure PHP is installed and configured properly on your server, we’ll now proceed to create a PHP script for testing purposes.
Now that you’ve designated a custom location for hosting your website’s files and directories (/var/www/project-lamp/), let’s generate a PHP test script to verify that Apache can effectively handle and process requests for PHP files using the command:
vi /var/www/project-lamp/index.phpNow, let’s insert our PHP code. Below is a basic PHP code example that prompts the user for their name and greets them. This code displays a form where the user can input their name. When the form is submitted, it checks if the name field is empty. If it’s not empty, it displays a greeting with the provided name. If the name field is empty, it prompts the user to enter their name. However, you can use yours; what matters is that you confirm it works on our browser.
<!DOCTYPE html>
<html>
<head>
    <title>Greeting Form</title>
</head>
<body>
    <?php
    // Check if the form is submitted
    if ($_SERVER["REQUEST_METHOD"] == "POST") {
        // Get the name from the form
        $name = $_POST["name"];
        // If name is provided, greet the user
        if (!empty($name)) {
            echo "<h1>Hello, $name!</h1>";
        } else {
            echo "<h1>Please enter your name!</h1>";
        }
    }
    ?>
    <form method="post" action="<?php echo htmlspecialchars($_SERVER["PHP_SELF"]);?>">
        <label for="name">Enter your name:</label>
        <input type="text" id="name" name="name">
        <input type="submit" value="Submit">
    </form>
</body>
</html>
Now that the moment of truth has arrived, save the file and refresh the page. If you inserted the PHP code above, your browser should look like this:
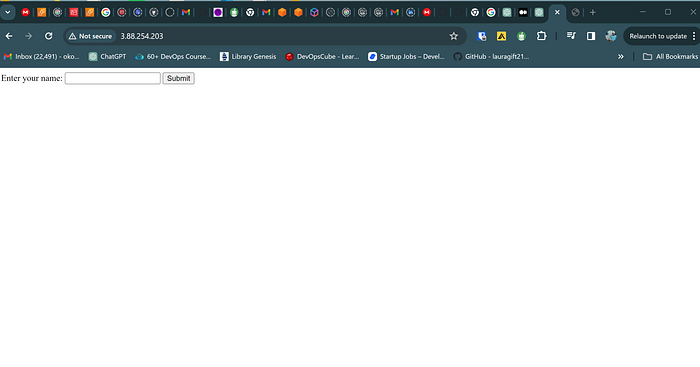
If you can see this page in your browser, then your PHP installation is working as expected.
After checking the relevant information about your PHP server on that page, it’s advisable to delete the file you generated, and possibly terminate your EC2 instance. It contains sensitive information regarding your PHP environment and Ubuntu server. You can use the "rm" command to accomplish this task.
sudo rm /var/www/project-lamp/index.phpIn conclusion, we’ve successfully set up a LAMP stack on our Ubuntu server hosted on AWS. We also installed Apache, MySQL, and PHP, configured a virtual host, and tested PHP functionality. With a functional web server ready, remember to maintain and secure it regularly. This marks the completion of our LAMP stack setup.
Thank you for following along on this journey. See you next time!
In Plain English 🚀
Thank you for being a part of the In Plain English community! Before you go:
- Be sure to clap and follow the writer ️👏️️
- Follow us: X | LinkedIn | YouTube | Discord | Newsletter
- Visit our other platforms: Stackademic | CoFeed | Venture | Cubed
- More content at PlainEnglish.io