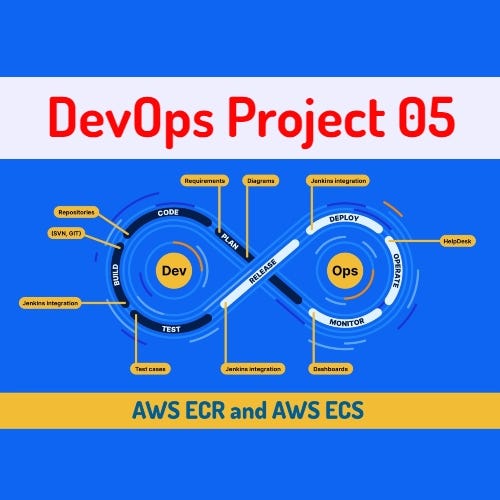
DevOps Project 05
Hands-on DevOps Project 05

A new day, a new Project. Let’s learn along!😉
In the dynamic realm of cloud computing, orchestrating and deploying applications seamlessly is a necessity. This story takes you on a journey through deploying a Node.js application on Amazon Web Services (AWS) using the Elastic Container Service (ECS) Fargate and Elastic Container Registry (ECR). We’ll explore the underlying technologies, tools, and steps required to achieve this feat.
The project leverages cutting-edge technologies to bring your Node.js application to life:
- Node.js: A popular JavaScript runtime that allows you to build scalable and efficient server-side applications.
- Docker: A containerization platform that packages your application and its dependencies into isolated containers for consistent deployment.
- AWS ECS Fargate: A serverless compute engine for containers that allows you to run containers without the need to manage the underlying infrastructure.
- AWS ECR: A fully managed Docker container registry that makes it easy to store, manage, and deploy Docker container images.
Let’s start..

Step 01:- Cloning the source code from GitHub
- Login to AWS Console and create an EC2 instance and allow port 8000 in inbound rules.
- Name: ECR_ECS, AMI: Ubuntu 22.04, type:t2.micro > Launch Instance

- Now, Connect to instance and Clone the repository from GitHub.
- https://github.com/SaurabhDahibhate/node-todo.git

Step 02:- Create IAM user and Installation of AWS CLI and Docker.
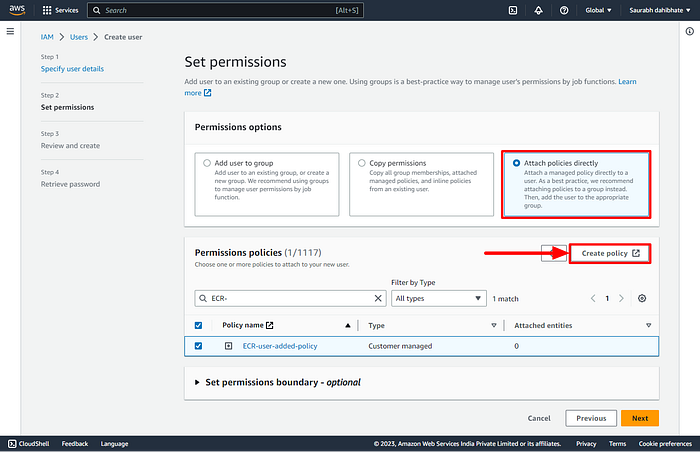
- Create an IAM user in the AWS management console.

- Select attach policies directly and write following policies .
- Write the policies required for accessing the ECR.
{
    "Version": "2012-10-17",
    "Statement": [
        {
            "Effect": "Allow",
            "Action": [
                "ecr:GetDownloadUrlForLayer",
                "ecr:BatchGetImage",
                "ecr-public:BatchCheckLayerAvailability",
                "ecr-public:PutImage",
                "ecr-public:DescribeRepositories",
                "ecr-public:GetRepositoryPolicy",
                "ecr:ListImages",
                "ecr-public:DeleteRepository",
                "ecr-public:CreateRepository",
                "ecr-public:GetAuthorizationToken",
                "sts:GetServiceBearerToken",
                "ecr-public:InitiateLayerUpload",
                "ecr-public:UploadLayerPart",
                "ecr-public:CompleteLayerUpload"
            ],
            "Resource": "*"
        }
    ]
}
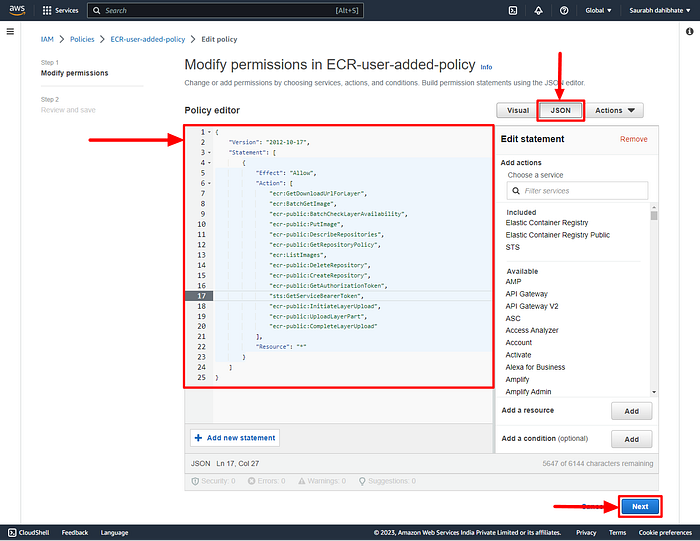
- Now search and select created policy and click on Next.
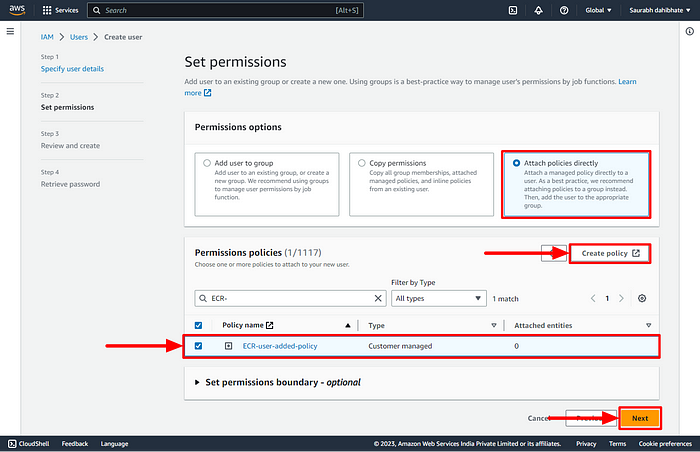
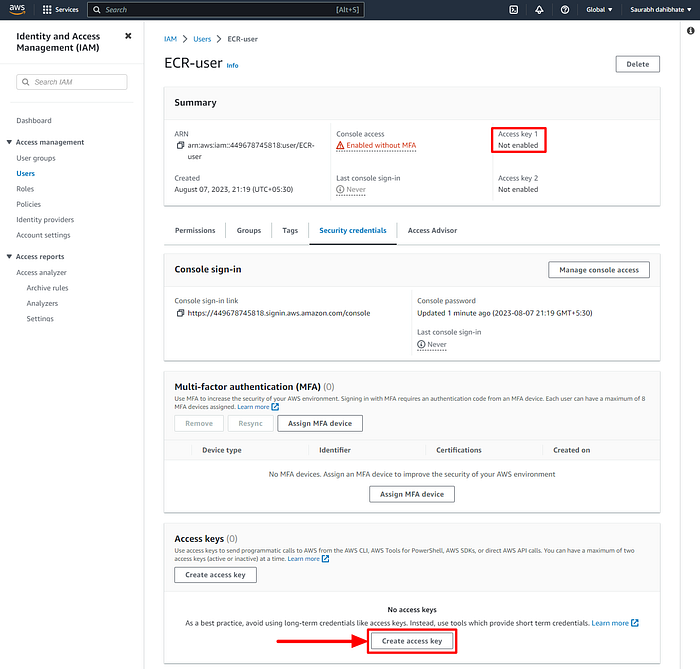
- User is created successfully but there is not any access key that key we have to Create.
- Click on create access key.
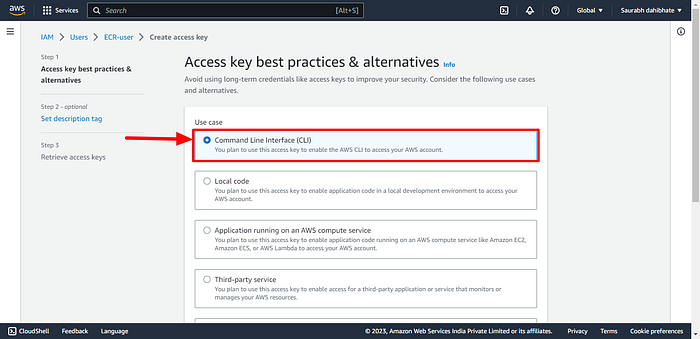
- We want access of CLI so select Command Line Interface.
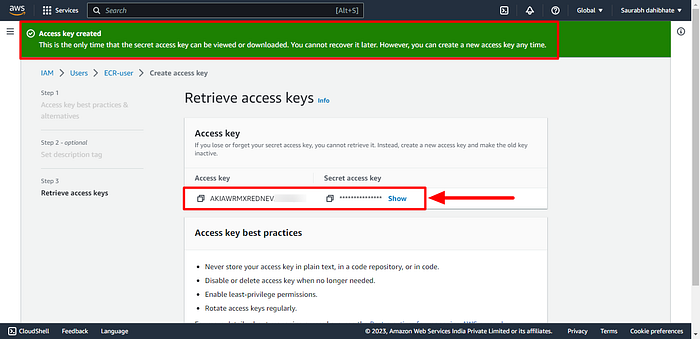
- Access key is created successfully done.
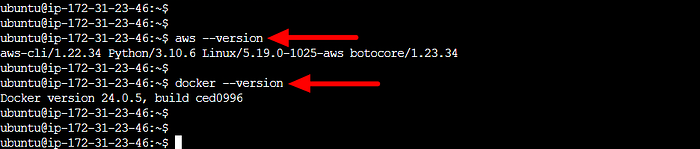
- Install AWS cli (sudo apt install awscli)
- Install docker (Click Here for Docker installation)
- Add ubuntu user to docker group
sudo usermod -aG docker ubuntu` - Connect the EC2 instance with AWS management console through awscli.

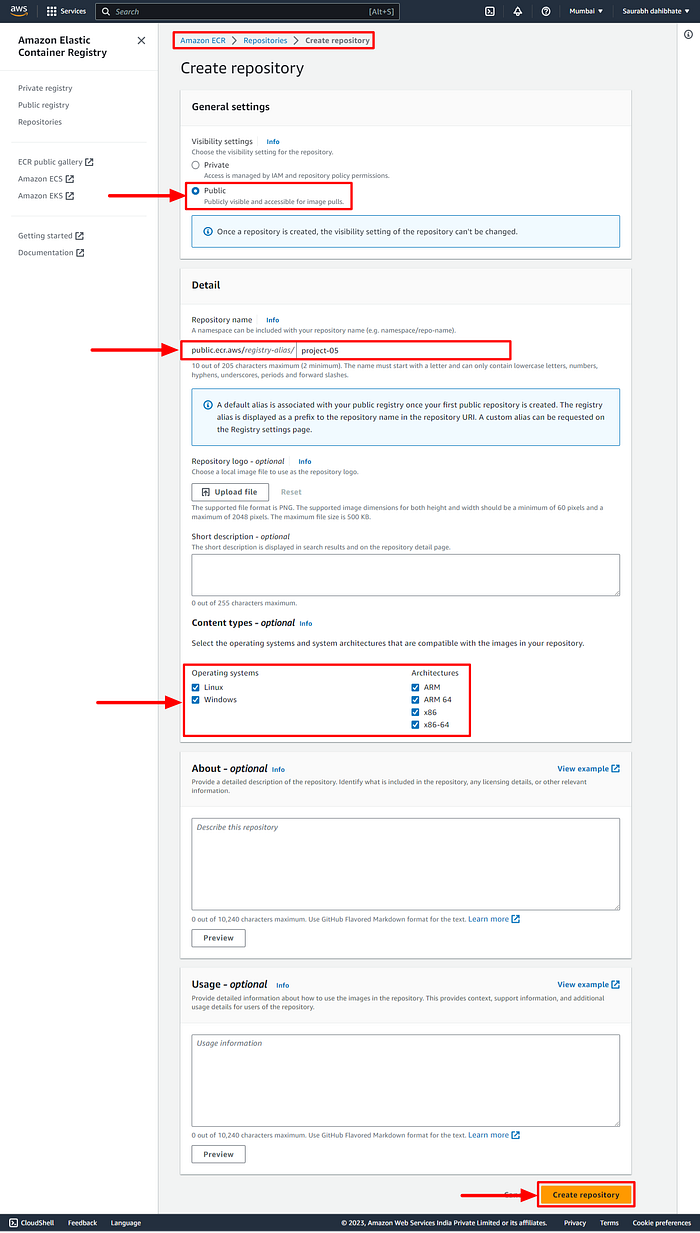
Step 03: Create container registry on ECR and Push docker image to ECR
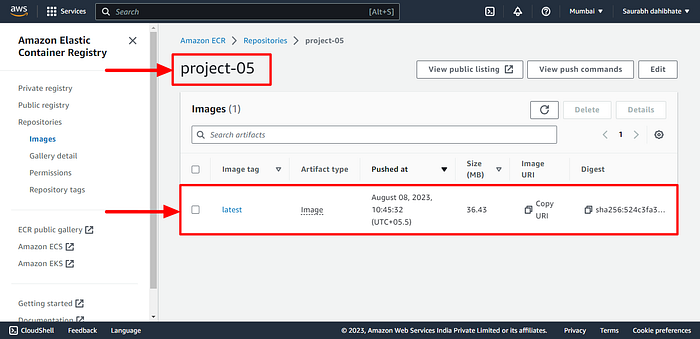
- Go to AWS ECR in the AWS management console.
- Create a repository. I have selected the public repository and the repo name.
- Select all the operating systems and versions according to the OS of Fargate you would select. Finally, create the repository.
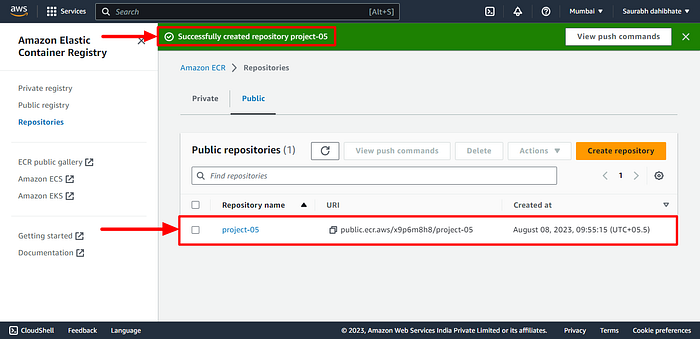
- Repository has been created successfully.
- Now go to instance and write a Dockerfile to build Docker image.
FROM node:12.2.0-alpine
WORKDIR app
COPY . .
RUN npm install
RUN npm run test
EXPOSE 8000
CMD ["node","app.js"]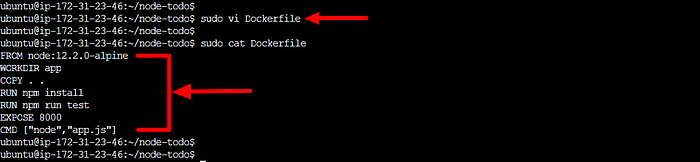
- Now, we will run the given commands that will be given in the “View Push Command” on the EC2 instance.
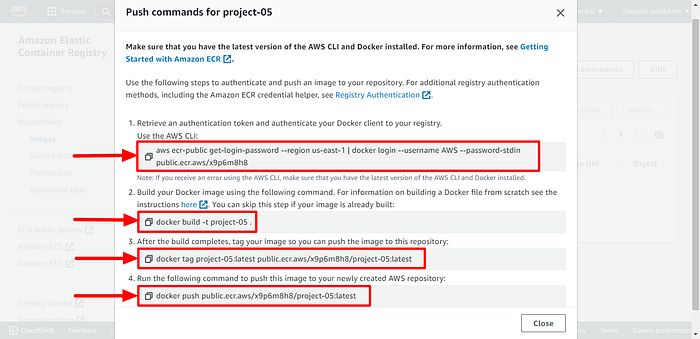
- Now Run first command to authenticate your docker client to your container registry.

- Build docker image with tag project-05
docker build -t <tag-name> .`
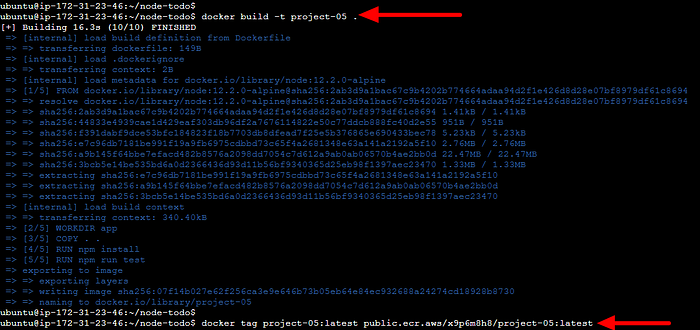
- Push docker image to ECR repository
docker push <repo url>:latest`
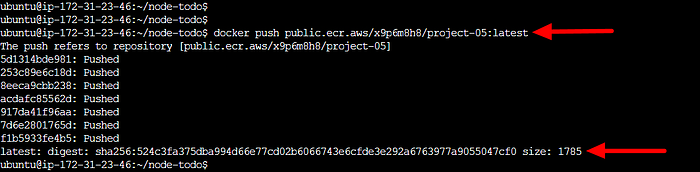
- After the image push, you can check the ECR for the image.
Step 04:- Create a Cluster in ECS.
- Navigate to the ECS service in the AWS console.
- Create a cluster in ECS.
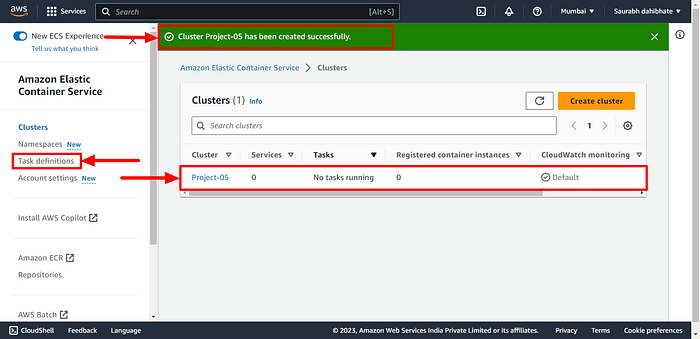
- Provide the Cluster name, VPC and subnet you want your application to be available on.
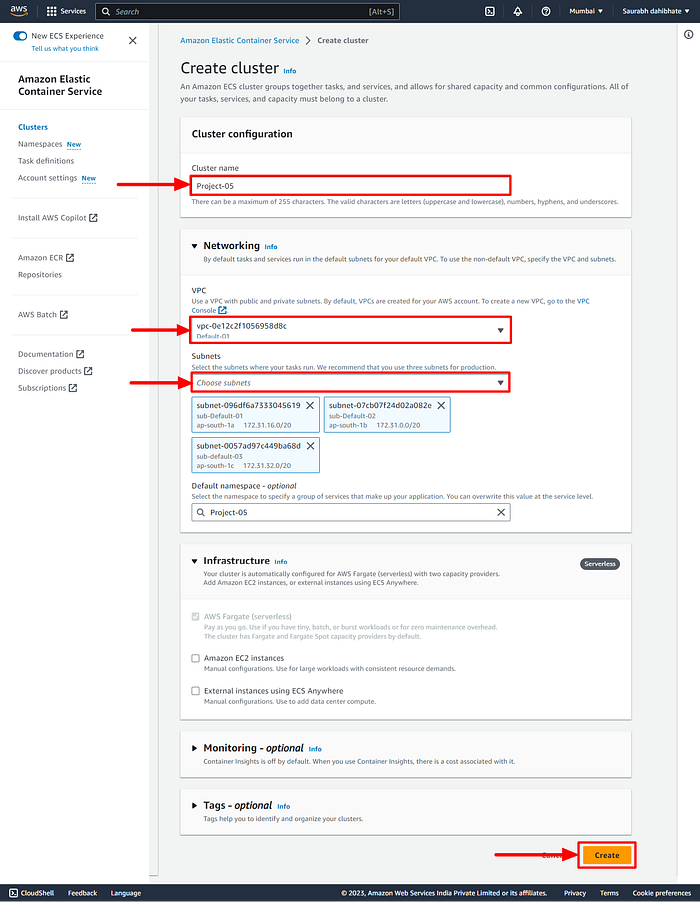
- The cluster is now ready!!!
- We used to run docker run to create a container in the EC2 instance out of the docker image. That was nothing but a task. Therefore let’s create a task definition for our cluster.
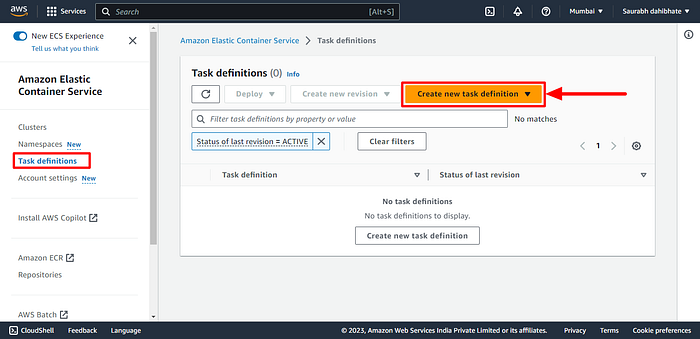
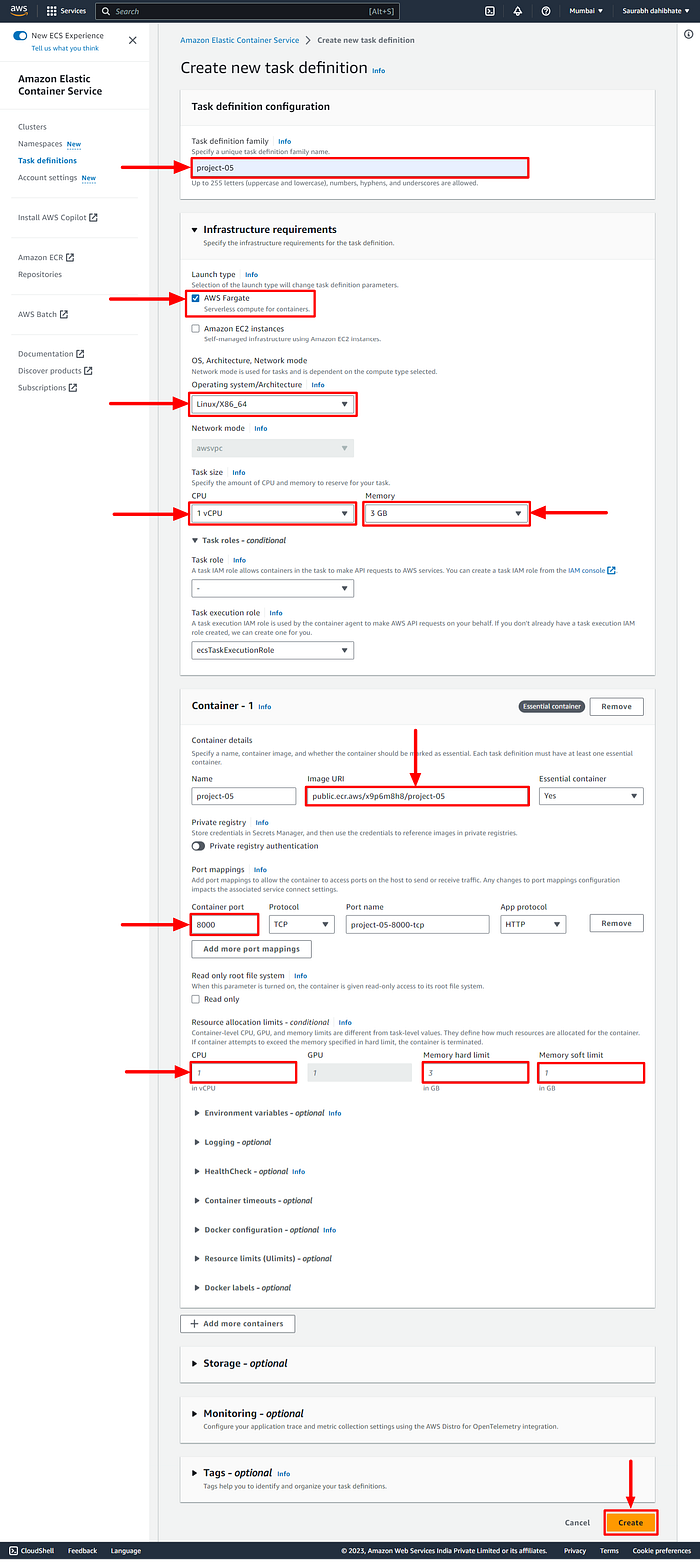
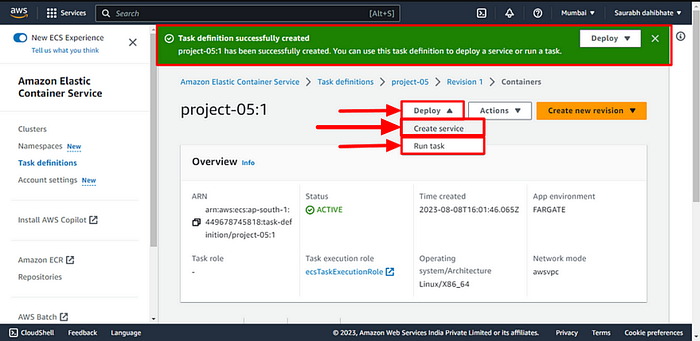
- Now, we will configure a task definition here, by providing the Task Name, Container Name, and URL of the image that is in the Repository and clicking on “Create”.
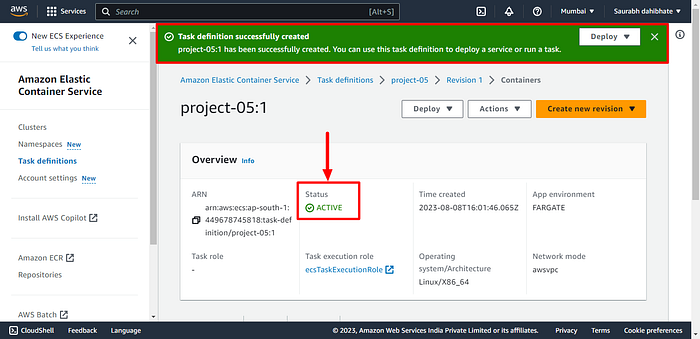
- Here, you can see that the task status is active.
- Now, click on “Create service”.
- Choose the cluster. Select the launch type to be Fargate.
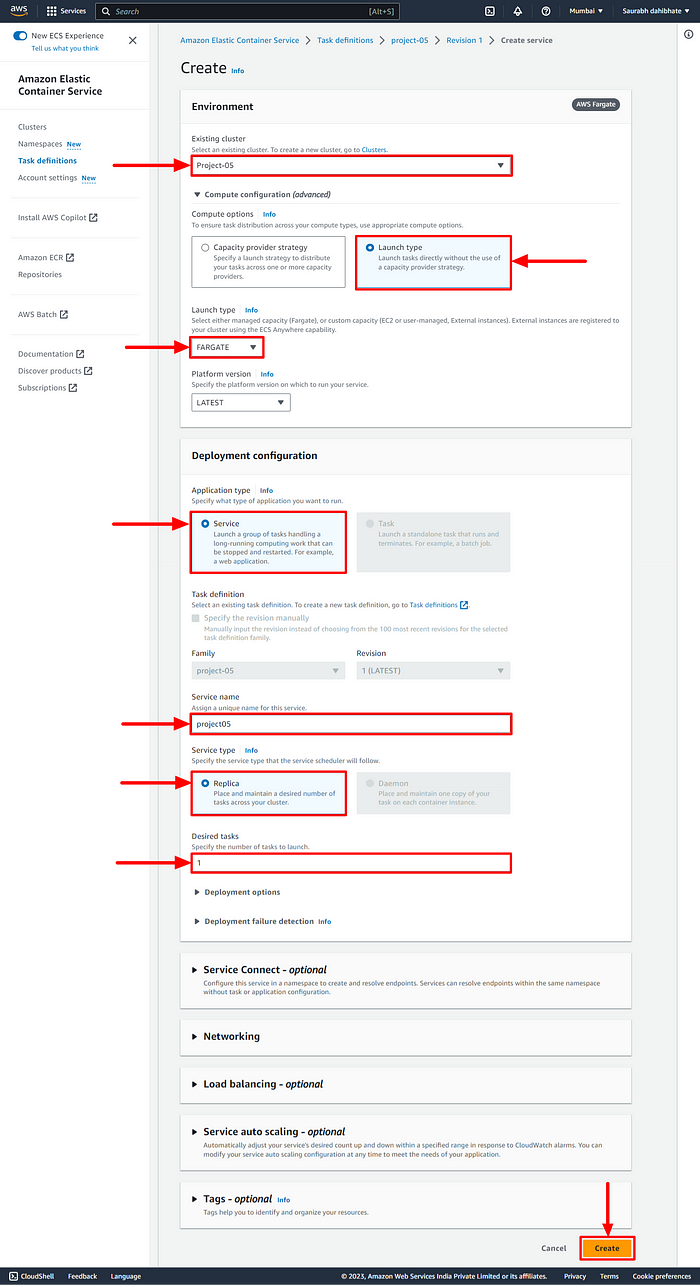
- The task is now deployed to the cluster.
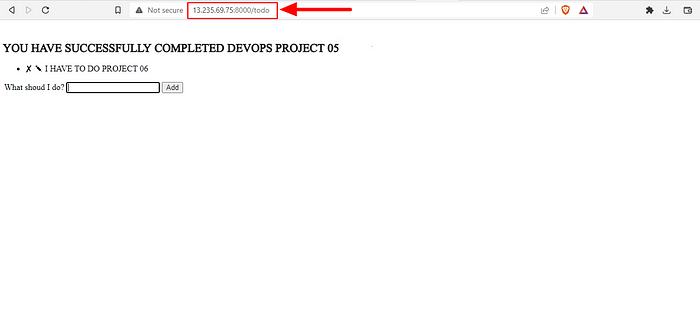
- Navigate to the ENI ID in the task.
- Go to the security group URL.
- Navigate to the Inbound rule in the security group and open the Port 8000 which is HTTP and select my IP to have access for myself.
- Copy the Public Ip of the Container with port 8000, and the site will be live.
⛔Note:-Don’t forget to Stop or Delete all clusters and services of ECS otherwise this will cost you unknowingly..⚠⚠
🔶That’s all about today’s task of DevOps journey
🔸Thankyou for reading 👍.
If you liked this story then click on 👏👏 do follow for more interesting and helpful stories.
More content at PlainEnglish.io. Sign up for our free weekly newsletter. Follow us on Twitter, LinkedIn, YouTube, and Discord. Interested in Growth Hacking? Check out Circuit.
— — — — — — — — #keepLearning_DevOpsCloud ♾️☁️ — — — — — —